| On This Page 1. Why Onboarding Decides Whether Users Stay 2. What Is a Product Tour System? 3. The Three Building Blocks 4. How a Product Tour System Works Under the Hood 5. Build vs Buy: Library, SaaS Tool, or Custom? 6. How to Build One: Steps, Stack, Cost, Timeline 7. Real Case Study: A Platform Users Adopted Without Training 8. FAQs (Short Answers) |
How many of your new sign-ups ever reach the moment your product actually pays off? For most SaaS, a large share never get there; they log in once, feel lost, and quietly leave. As the senior web application lead at Acquaint Softtech, I have rebuilt onboarding for products where the feature set was strong but the first five minutes were not, and the fix is almost always in-app guidance. Our hire MERN stack developers build product tour systems that walk users to value instead of leaving them to guess.
A blank dashboard, an unexplained button, or a dead-end empty screen all push a curious user toward the exit. Worse, in-app guidance that ignores accessibility locks out part of your audience, which the US government’s guide to accessible web design treats as a baseline, not a nicety. Good onboarding is not decoration; it is the difference between activation and churn.
This guide is practical: what a product tour system is, its three building blocks, how it works under the hood, whether to build or buy, and what it costs. It pairs with our wider SaaS product development guide for the strategy around it. Read on, then design a first run your users can actually follow.
Why Onboarding Decides Whether Users Stay
Activation, not sign-up, is where SaaS growth is won or lost. A user who completes one meaningful action in the first session is far likelier to stay, while one who stalls rarely returns. A product tour system exists to shorten the path to that first win. Designing that path is a core software product development concern, not a late cosmetic add-on.
Why do users abandon a product in the first session?
Most abandonment is not about missing features; it is about not knowing where to start. A new user faces an empty screen, unfamiliar terms, and no obvious next step, so they bounce. Mapping the exact moments where users get stuck is something we do in a discovery workshop before building anything.
What does a tour system change?
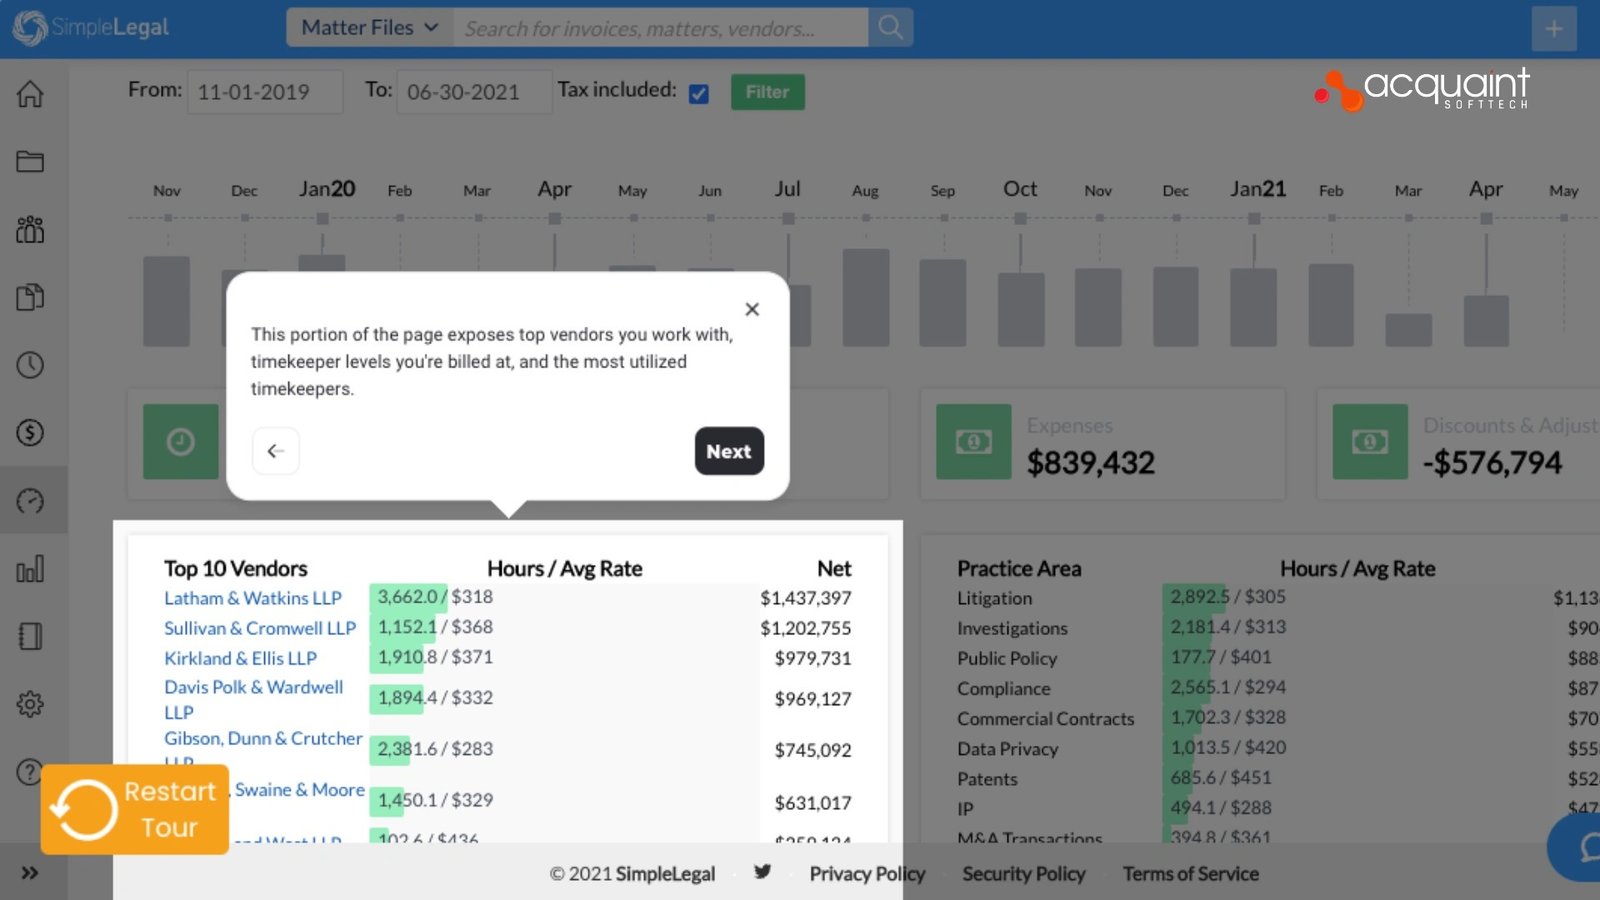
A good tour system replaces guesswork with a guided first run: it points to the right button, explains a term in context, and turns an empty list into an invitation to act. The result is higher activation, fewer support tickets, and faster time to value. The engineering judgment behind delivering that well sits among the best software product engineering companies in 2026.
What Is a Product Tour System?
A product tour system is the in-app layer that teaches users how to use your product while they use it. It combines guided walkthroughs, contextual tooltips, and informative empty states into one coordinated onboarding experience. Unlike a static help center, it appears at the right moment, anchored to the right element. Teams building this UI layer often hire MEAN stack developers to keep it fast and component-driven.
How is it different from a help center or docs?
Documentation waits for users to leave the product and search; a tour system meets them in the flow. It is contextual, interactive, and stateful, remembering what a user has seen and adapting to their role. Wiring that into a live app without breaking existing screens is where seasoned IT staff augmentation engineers help most.
What are the benefits and 2026 trends?
The benefits are measurable: higher activation, lower support volume, faster feature adoption, and better retention. In 2026, the trend is toward personalized, segmented onboarding driven by user behavior, plus accessible, lightweight overlays that do not slow the app. The component patterns behind a clean implementation are explained in our complete development guide.
The Three Building Blocks
A product tour system rests on three parts that do different jobs. Walkthroughs drive a sequence of actions, tooltips answer in-context questions, and empty states turn a blank screen into a first step. Used together, they cover the whole first-run journey. Building these reusable components is core hired Laravel and front-end work when the backend stores tour state.
Walkthroughs, tooltips, and empty states: what each does
Walkthroughs are multi-step guides that spotlight an element, explain it, and advance to the next, ideally skippable and resumable. Tooltips are small, just-in-time hints triggered by hover, focus, or a beacon, kept short so they help without nagging. Empty states are the screens shown before data exists, and the best ones teach plus offer a single clear action. Designing all three to work across roles is a job for dedicated development teams.
| Block | Job | Best practice |
| Walkthrough | Guide a sequence of actions | Short, skippable, resumable |
| Tooltip | Answer a question in context | Brief, accessible, dismissible |
| Empty state | Turn a blank screen into a start | Teach plus one primary action |
The biggest mistake is treating these as one giant tour shown all at once. The better model is progressive: a short first walkthrough, then tooltips and empty states that appear only where relevant. That stage-based thinking mirrors how we approach other architecture choices, as in our look at Laravel vs MERN stack for startups.
How do you guide users without annoying them?
The line between helpful and irritating is control. Let users skip, dismiss, and replay anything; never trap them inside a tour; and never auto-launch a long sequence on every visit. Trigger guidance by context and behavior: a tooltip when a user first reaches a feature, an empty state when a list is genuinely empty, so the help feels timely rather than pushy. Measuring completion and drop-off per step tells you which moments help and which to cut.
How a Product Tour System Works Under the Hood
Under the surface, a tour system is a small state machine plus a targeting and rendering layer. It tracks which step a user is on, finds the target element on the page, positions an overlay near it, and records progress so the tour never repeats unwanted steps. Teams that want this engineered cleanly often hire remote developers with strong React and DOM experience.
What are the core moving parts?
Five pieces matter: a step engine, element targeting by selector or ref, positioning with a library like Popper, an accessible overlay or spotlight, and a store for progress and feature flags. Content lives in a config, often JSON, so product managers can edit tours without a deploy. Targeting needs to survive UI changes, so stable data attributes beat brittle CSS selectors, and the overlay must reposition cleanly on scroll, resize, and route changes. Keeping those moving parts stable as the UI evolves is a support and maintenance responsibility.
Where does accessibility fit?
Overlays and tooltips must be keyboard navigable, manage focus, and expose the right roles so screen readers can use them, exactly what WCAG and Section 508 require. Skipping this excludes users and creates legal risk. The architecture patterns that keep these layers reliable and scalable are covered in our architecture and scaling guide.
Read Also: The Role of Crypto in E-Commerce
Build vs Buy: Library, SaaS Tool, or Custom?
You have three real options: an open-source library you embed, a no-code SaaS tool, or a fully custom system. Libraries like Shepherd.js, React Joyride, and Driver.js are free, embedded, and customizable, while tools like Appcues or Userpilot are fast for non-developers but cost monthly and offer less control. The trade-off is speed and convenience versus control and data ownership, a classic software development outsourcing decision.
| Option | Best for | Trade-off |
| Open-source library | Most product teams | You build orchestration and analytics |
| No-code SaaS tool | Marketing or PM-led teams | Recurring cost, less control, data leaves app |
| Fully custom | Complex or deeply integrated UX | Most build effort, full control |
Which option should most SaaS choose?
For most products, a library plus a thin custom orchestration layer is the sweet spot: free at the core, embedded for speed, and flexible enough to match your design and data. No-code tools suit teams that need to ship onboarding without engineering, and full custom fits products with unusual flows. Behavior-driven, personalized onboarding increasingly leans on usage data, which connects to our AI development services.
Cost matters too, and building in-house with the right partner is often cheaper than years of per-seat tool fees. One startup found similar savings when it saved $60K a year on remote hiring, and the same logic applies to onboarding infrastructure you own.
What are the hidden costs of no-code tools?
No-code onboarding tools look cheap until you scale. Pricing usually rises with active users or sessions, so a tool that costs little at launch can become a significant line item at scale. They also load third-party scripts that can slow your app and send user data outside your systems, which matters for privacy and compliance. For products where onboarding is a core experience, owning the code often pays back within a year or two.
How to Build One: Steps, Stack, Cost, Timeline
Building a product tour system follows a clear order, and the value comes from sequencing it to your activation moments, not from the widget itself. The build moves from mapping the journey, to choosing an engine, to components, to targeting, to persistence, to analytics, to configurable content. Backends that store tour state and progress often hire Python developers for the API layer.
How do you build a product tour, step by step?
This is the order we follow on real builds:
1. Map each persona’s activation path and the one action that signals value.
2. Choose an engine: a library like Shepherd.js or a custom React layer.
3. Build accessible components: tooltip, modal, and spotlight overlay.
4. Add element targeting and positioning, with responsive handling.
5. Persist progress per user and gate tours behind state or feature flags.
6. Add analytics, A/B tests, and skip or resume controls.
7. Make content editable in an admin panel so non-developers can update it.
How much does it cost, and how long does it take?
A focused MVP, a couple of guided tours, tooltips, and empty states using a library, can ship in two to four weeks. A production system with persistence, analytics, A/B testing, internationalization, and an editor for content takes roughly six to ten weeks. Migrating or upgrading an existing onboarding layer is a defined version upgrade services project, and India-based teams deliver this at up to 40% lower cost.
What tech stack is best for a product tour system?
A reliable stack uses React for the UI, a library such as Shepherd.js, React Joyride, or Driver.js (or a custom layer) with Popper for positioning, and a Node or Python backend to store progress and serve tour config. Add analytics through PostHog or Segment, plus feature flags for targeting. The deployment and release patterns behind a safe rollout are covered in our app deployment guide.
| Layer | Recommended Tech | Role |
| UI | React + Shepherd.js / Joyride/custom | Render walkthroughs and tooltips |
| Positioning | Popper / floating-ui | Anchor overlays to elements |
| Backend | Node or Python API | Store progress, serve tour config |
| Analytics | PostHog / Segment + flags | Measure completion, target, A/B |
What are the best practices for a product tour build?
A few rules keep a tour system effective over time. Keep each walkthrough to a handful of steps, because completion drops fast after that. Segment by role and behavior so users only see what is relevant, and store progress server-side so the experience survives across devices. Treat onboarding content as a living product, review step completion monthly, retire steps that no longer help, and test changes with real users before rolling them out.
Real Case Study: A Platform Users Adopted Without Training
The real test of onboarding is whether non-technical people can use a product without a manual. That was the goal when we built a workflow platform for Stack ehf., an Icelandic product studio, on the MERN stack. Steering a build like this through clear milestones is where a strong project manager keeps scope and quality aligned.
The situation
Stack ehf. was running approvals through spreadsheets and email, so work stalled, and mistakes slipped through. They needed a centralized platform that teams would actually adopt, with real-time visibility and approval flows that could change without a developer each time. The risk was building something powerful that people found too complex to use.
What we built
We designed a MERN platform around clarity: a visual workflow builder for defining stages and approvals, role-based views so each user sees only what matters to them, real-time notifications, and activity logs that make progress obvious. A configurable admin panel lets the team adjust workflows themselves, which is the product-tour principle applied to setup, guiding the user to the right action instead of forcing a support ticket. The broader portfolio of similar builds lives on our case studies page.
What changed
After rollout, the platform reduced approval cycle times and process errors, and stayed stable as the team refined it. People adopted it without heavy training because the interface guided them, the same outcome a good tour system delivers. More engagements like this are documented in our project case studies.
FAQs
What is a SaaS product tour?
It is in-app onboarding that guides new users to value using guided walkthroughs, contextual tooltips, and informative empty states, shown in the flow rather than in separate docs.
How much does a product tour system cost to build?
A library-based MVP is two to four weeks of work; a production system with analytics and an editor is six to ten weeks. India teams cut costs up to 40%.
What features does a product tour system need?
Element targeting, positioning, accessible overlays, skip and resume, progress persistence, segmentation, analytics, A/B testing, internationalization, and an editor for content.
How long does product tour development take?
Two to four weeks for a focused MVP; six to ten weeks for a full system with persistence, analytics, A/B testing, and configurable content.
What tech stack is best for a product tour?
React with a library like Shepherd.js, React Joyride, or Driver.js, Popper for positioning, and a Node or Python backend to store progress and serve tour config.
Should I build a product tour or buy a tool?
Buy a no-code tool for speed without engineering; build with a library and custom orchestration for control, data ownership, and a fit to your own design.
Does Acquaint Softtech build custom product tour systems?
Yes. We design and build accessible walkthroughs, tooltips, and empty states, with analytics and configurable content, as we did for Stack ehf.